If you run a blog or produce other text content on your website that you want to enrich with images from your gallery, you can very easily insert such images into your post. You can see the step by step walkthrough in this video:
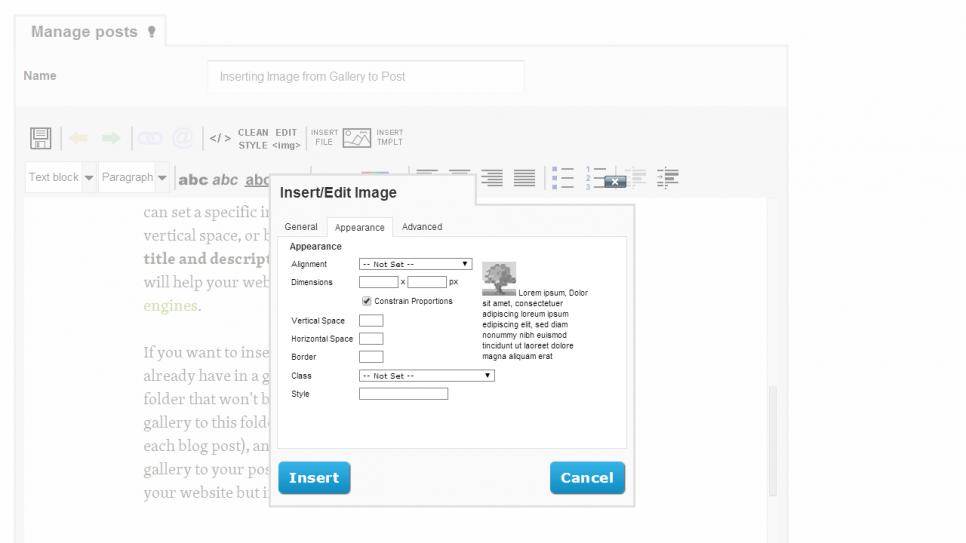
You can then further edit this image by clicking on the EDIT <img> button in the control panel of your post. There you can set a specific image dimensions, its horizontal or vertical space, or border. If this image also doesn't have a set title and description, we recommend you to fill them in. It will help your website with its optimization for search engines.
If you want to insert an image to your post that you don't already have in a gallery, all you need to do is create a folder that won't be visible on your website, and add a gallery to this folder (or more galleries, for example one for each blog post), and you can then insert images from this gallery to your post. Nobody will see them anywhere else on your website but in the post you insert them in.

Final tip: if you upload an image this way to the system, you can simply change it using the ReUpload button. And if you name this image the same way you named the previous one (just move the mouse over the image in the administration and its name will show), it will then automatically change in your post.
Warning! If the new image will have a different name, it will disappear from your post and you will have to insert it there again.


