In some instances, LightWidget is a paid service. If you set up your website with JuicyFolio and you'd have any problems, just contact us and we will help you set the Instagram widget up.
If you are a photographer, an illustrator, or other original artist, then aside from posting photos and images on your portfolio, you may also be using an image social network service Instagram, on which anyone can see up to date overview of your latest works. But what to do if you want to combine these two platforms and show Instagram photos also on your portfolio website?
As you probably already know, Instagram (as well as other social networks) allows you to embed HTML code of a specific social post on your website. However if you want to display a larger profile feed with more images, you need to use some of the external applications outside of Instagram. And one of these apps is called LightWidget.
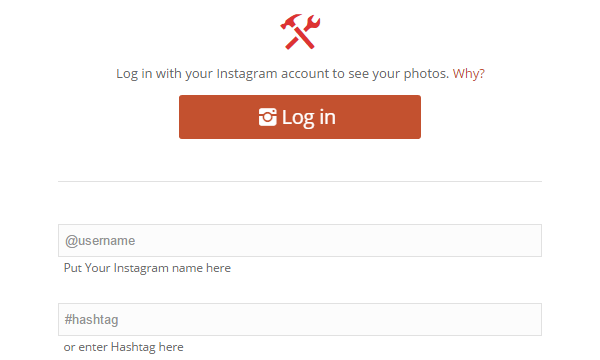
On lightwidget.com, you can find a form that allows you to create a widget that represents your profile on Instagram and thumbnail links to each of your photos on it. First you need to Log in to your Instagram account or (if you want to create a widget for a profile other than your own) fill out the @username box. However if you want to create a widget not of a user, but of a specific hashtag, fill out the #hashtag box instead. Whenever you then want to see the changes you made to the widget you are creating, click on the Preview button on the bottom of the page and you'll see the preview of the widget on the left side of your screen.
There are now some other settings you can tune. The Type of widget shows in what way your widget will be shown. The options are: Grid, image Slideshow, and Columns (in a similar way to how images are shown on Pinterest).
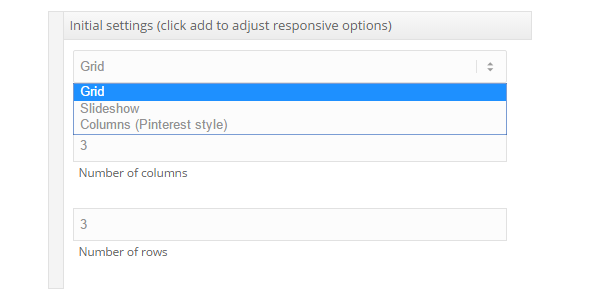
With Grid, you can set up a specific number of rows and with Columns number of photos. With both of these types you can also set up the number of columns.
The next option (used for Grid and Slideshow) allows you to set up an image hover effect, with the default option being none. The other effects are:
- Fade In – the thumbnail lightens on hover
- Fade Out – all thumbnails are lighted and the effect disappears on hover
- Zoom In – thumbnail zoom in on hover
- Zoom Out – thumbnail zoom out on hover
- Zoom and rotate – thumbnail zoom and slight rotation on hover
- Icon overlay – magnifying glass icon over thumbnail on hover
- Show Caption – preview of image description on hover
Using the Amount of space between pictures function, you can set up the number of pixels between individual thumbnails. If you set the value to "0", the thumbnails will form a grid of gapless tiles.
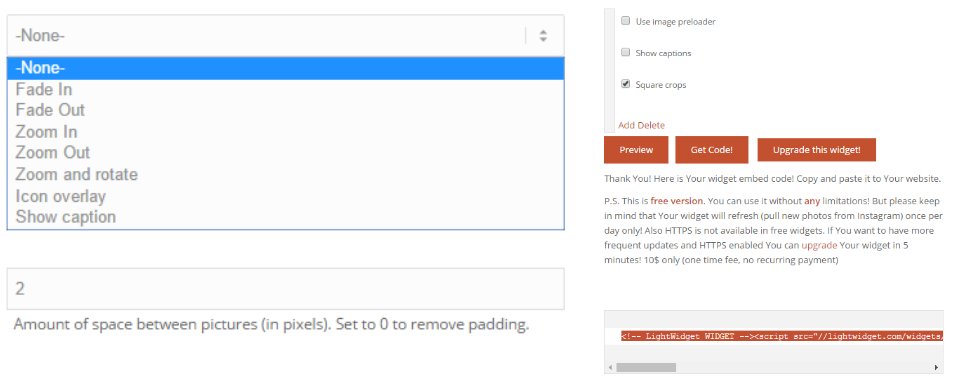
Last few options are just for tightening things up a bit. By checkmarking the Use image preloader option, you can show a loading icon before images load properly. The Show captions function then allows you to show parts of description under each photo, while you can set up how many characters from the description you want to show (if you want to display the entire description, enter number "999"). Finally, by checking the Square crops option, you can show the thumbnail of each photo as a square (otherwise the thumbnails will be shown in their original aspect ratio).
If you want to create more Instagram widgets than just one, just click on Add. If you then would like to delete some of the widgets, press Delete. When you're satisfied with your widget or widgets, click on the Get Code! button, which will generate a HTML code of your widget that you can copy to your portfolio. The final card may then look for example something like this:
Your widget can be stretched to the full width of your website content area, or displayed as a slim column on the side of your content (for example with the help of our text templates). If you'd like us to help you with creating your widget or adding its HTML code to your website, don't hesitate to contact our customer support.

